Wireless routers are wonderful things! They let us use our laptop all around the house, without having to worry about messy cables everywhere. They keep our tablets connected to the internet and our smartphones from wasting costly data packages.
But the downside is, that anyone in the area can also use your wireless internet, which can slow down your browsing speeds or even get you in trouble with the law, if someone uses your connection for illegal purposes.
|
You might be asking yourself: “What can I do? I don’t know anything about passwords and routers!” – That’s why we’ve created this
guide to setting up your wireless router’s password.
|
It’s highly recommended that you get your wireless router’s user manual. If you don’t have it, don’t worry, most routers work in a similar way.
I would also recommend that you perform these actions with a computer that is connected to the router with a cable – When you change or set up a new password, the old one no longer works, so you’ll lose your connection to the router before we’re done with our setup, so a physically connected computer is our best bet.
This guide is fairly easy and shouldn’t take more than 5-10 minutes of your time.
|
OK, let’s start:
1. We need to setup the router, so we’ll start by logging into the configuration menu:
Launch a web browser (Like Chrome
 , or Explorer , or Explorer  ), and type the router’s address (known as the “IP Address”) in the address bar. The most commonly used router addresses are192.168.1.1 , 192.168.0.1 , 10.0.1.1 . If you entered the correct address, you’ll be prompted to insert your username and password. If you do not get the username/password prompt, you might be using the wrong address. ), and type the router’s address (known as the “IP Address”) in the address bar. The most commonly used router addresses are192.168.1.1 , 192.168.0.1 , 10.0.1.1 . If you entered the correct address, you’ll be prompted to insert your username and password. If you do not get the username/password prompt, you might be using the wrong address.
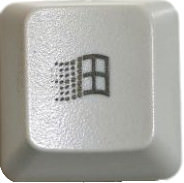
You can check what your router’s IP address is by holding the
 keyand pressing “R” on your keyboard, and in the widow that pops up, type “cmd” and click “OK”. keyand pressing “R” on your keyboard, and in the widow that pops up, type “cmd” and click “OK”.
You’ll see a command prompt with a black background. Type “ipconfig” (without the quotation signs) and hit the enter key. You’ll get a bunch of lines of text, but the only one you care about is the “Default gateway” – that will be your router’s IP address. Write it down, close all the open windows and insert the address into your internet browser’s address line.
|
2. Now we enter the username and password into the new prompt window. Usually, the username is either admin, Admin or ADMIN, with the password either being identical or being “password”. (If these don’t work, you can use this website to input your router maker’s name and get the list of common usernames & passwords.)
|
3. Now we’re in the router’s configuration menu, let’s find the wireless control menu. Look for an option called “Wireless”, “Wireless settings”, “security” or “WLAN”. Some variations of these exist, but the gist of this is to find the wireless security menu. Can’t find it? Turn to your manual. (Can’t find your manual? Go to this site and choose your router’s make and model for a free manual.)
|
4. Make sure that you set the security type (encryption) to WPA2 – this is currently the best type of encryption. Find the password field (might appear as "passphrase", "password" or "encryption") and fill it with your new password. If you want to be extra safe – make a random password, mix letters and numbers, use upper and lower-case letters or use symbols like “$” and “!” in your password. The more unique the password is – the stronger it is. Using a familiar number, word or name is not a good idea. You can always get a sticker, write down the password on it and stick it on the router so you don’t forget it.
|
5. We’re almost done! Now let’s change the network’s name. Look for the field called “SSID” (that’s what the wireless network name is called). Change the name to whatever you like, but make sure to only use letters and numbers. The reason we’re doing this is because when people see a wireless network with a default name, they’re more likely to try and break in, but are less likely to try that on a network with a unique name.
|
 |
6. We’re done! You should have a “Save”, “Apply Changes” or “Apply” button at the bottom of the screen - click it and let the router do its thing (could take between a few seconds to a minute).

Your router is now protected. (If you had any devices still connected to the old network name, you’ll need to reconnect them to the new one.)
|
CONGRATULATIONS! Your wireless network is now safe!
|
No comments:
Post a Comment